2 a. Create new customer
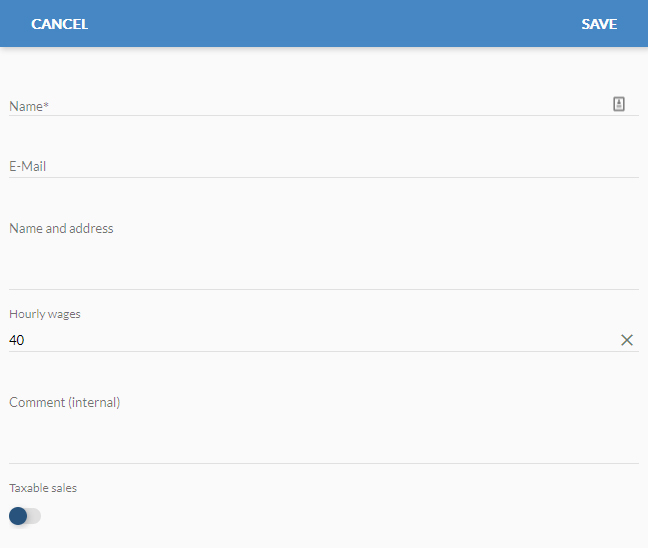
Click on the “+” symbol. Now a window opens to enter the information for the new customer profile.
Enter all the necessary customer information here, such as “name and address” for the letterhead of the automatically generated invoice. You can change the information at any time in the respective customer profile.
Name
The name of the customer profile that is stored in the system.
Enter the customer’s email address here. You can automatically send the invoice you have created to this e-mail address upon completion.
Name and address
A maximum of 5 lines – suitable for the letterhead on your invoice, so that you can easily print them out later. Billtano creates the tailor-made format template for letters directly. (You can find the preview view when you create a new invoice.)
Hourly wage
Set a customer-specific hourly rate here.
Comment (internal)
Use the free text field to enter a comment in the system.
VAT subject
Set the sales tax obligation on or off. If the option is switched on, the sales tax will automatically be listed separately on later invoices from this customer.
Click “Save” to complete the process.
(Click “Cancel” to undo the entry.)