

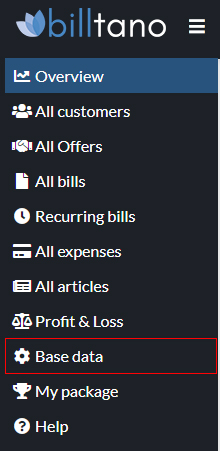
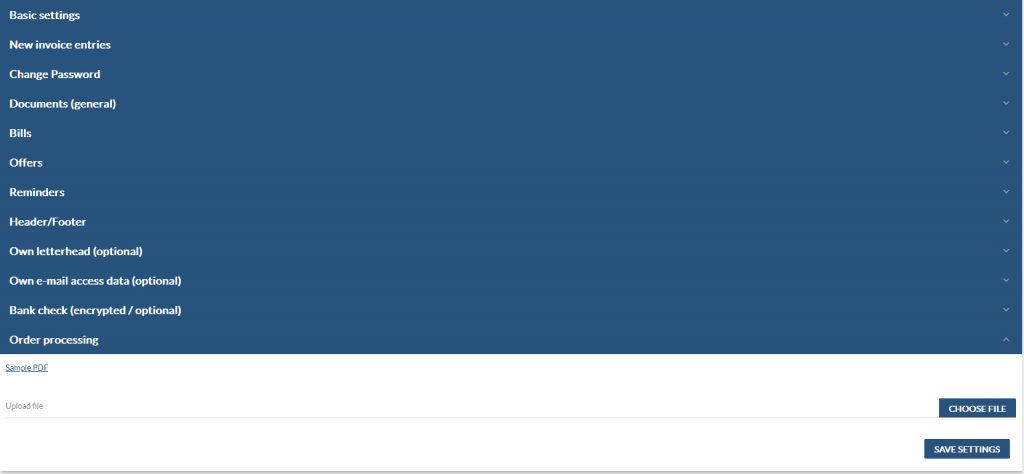
8. Master Data
In the “Master data” area, you enter all the essential information and data that you can use for various areas of your work environment.
- Basic settings
- New invoice entries
- Change Password
- Documents (General)
- Invoices
- Offers
- Reminders
- Header/Footer
- Own stationery (optional)
- Own E-Mail (optional)
- Bank reconciliation (optional)
- Order processing (OP)
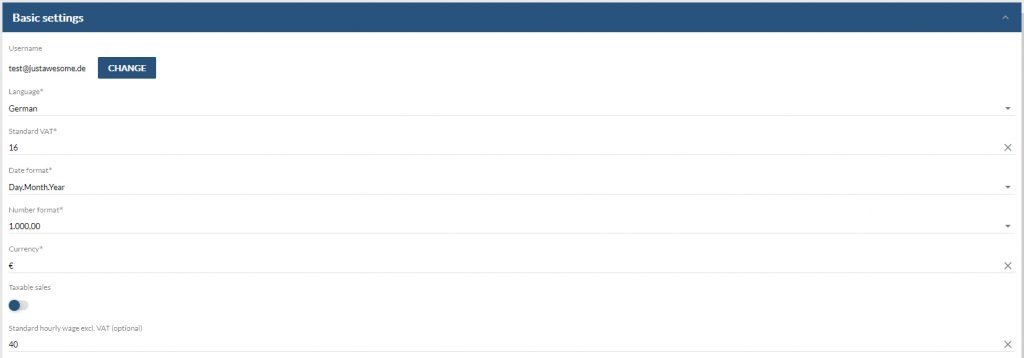
8.1 Basic Settings
Here you will find the following information for your profile to enter.
- Username – this usually corresponds to your e-mail address and is used to register in the app.
- Language – Choose the language output of the program between German and English
- Standard VAT – Define the standard VAT rate
- Date format
- day.month.year
- year/month/day
- year-month-day
- Number format – 1,000.00 or 1000.00
- Currency – e.g. Euro € or Dollar $
- Turn VAT liability on/off (e.g. for small businesses)
- Hourly wage excl. VAT (optional)
8.2 New Invoice Entries
You can predefine some settings when creating new invoice entries here. Configure the settings according to your needs
- Net prices or gross prices (on or off by default)
- Item number or date (later also on the invoice)
- Standard unit – e.g. hours or number
All information is then predefined, but can be changed manually for each entry if you wish.

8.3 Change Password
Here you can create a new password. Change your password according to the usual procedure.
- Enter current password
- Enter a new password
- Repeat password

8.4 Documents (General)
Personalize the look of your documents. This applies to all document types with the required company layout that you can create in billtano – invoices, offers, reminders, order confirmations.
Add company logo (file upload) – This will appear on the letterhead of your invoice and other documentation. The uniform layout on all documents gives your company a serious appearance.
Document Font – Select the font you want, e.g. sans serif or serif.
Add signature to documents (optional) – Select a file to upload.

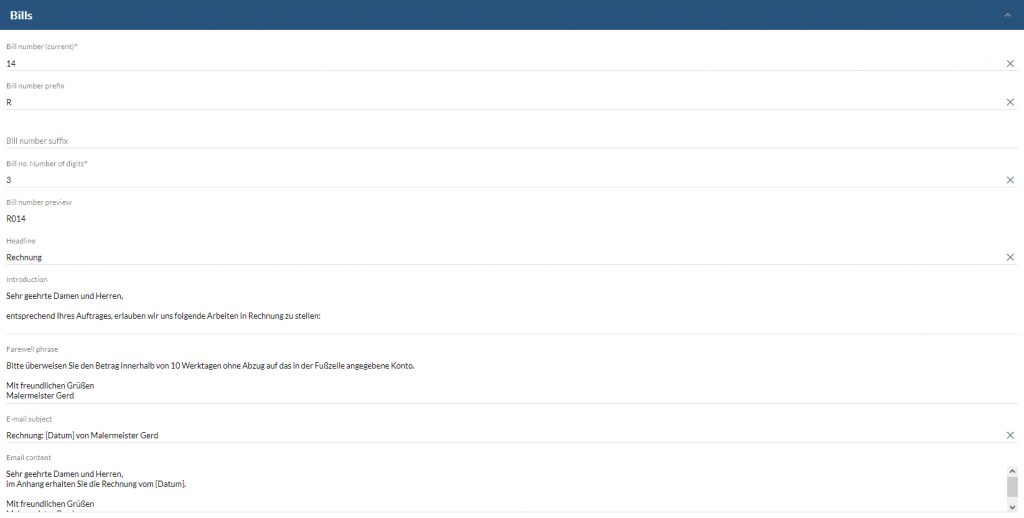
8.5 Invoices
Define the most important parameters for your invoice layout. Automate the e-mail dispatch and create ready-made text fields for sending.
- Invoice number (current)
- Invoice number prefix
- Invoice number suffix
- Invoice no. Number of digits
- Invoice no. Preview – view of settings 1-4
- Configure your invoice number system according to your needs. After a new invoice has been created, the invoice number is automatically counted further. For canceled invoices, you even have the option to change your invoice number manually.
- Headline
- Introduction – Text field to write an introduction
- Farewell phrase – Texfeld for writing a farewell phrase
- Email subject – “Invoice: [Datum] …” automatically inserts the current date
- Email Content – Include a standardized salutation that will be sent in the email.
8.6 Offers
Define the most important parameters for your offer layout. Automate the e-mail dispatch and create ready-made text fields for sending.
- Offer number (current)
- Offer number prefix
- Quote number suffix
- Offer no. Number of digits
- Offer no. Preview – view of settings 1-4
- Configure your invoice number system according to your needs. After a new invoice has been created, the invoice number is automatically counted further. For canceled invoices, you even have the option to change your invoice number manually.
- Headline
- Introduction – Text field to write an introduction
- Farewell phrase – Texfeld for writing a farewell phrase
- Email subject – “Offer: [Datum] …” automatically inserts the current date
- Email Content – Include a standardized salutation that will be sent in the email.

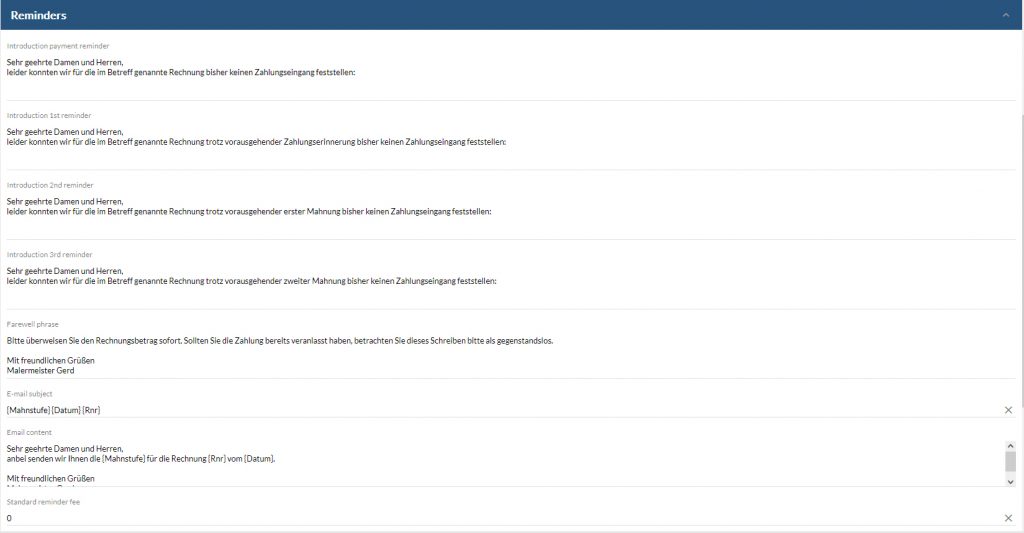
8.7 Reminders
Here you can store various text fields that will be sent with a reminder. The text field used changes depending on the current status of the reminders sent.
- Introduction payment reminder
- Introduction reminder
- Introduction 2nd reminder
- Introduction 3. Reminder
- Closing phrase
- E-mail subject
- E-Mail content
- Default Dunning Fee – Specify the dunning fee that will be charged with the dunning notice.
8.8 Header/Footer
Here you enter important master data that is displayed in the header and/or footer of your records and documents. This includes all important data of your company:
- First name, Last name
- Street, House number
- Postal code, City
- Phone number
- E-Mail Adress
- Website (https://…)
- VAT ID no.
- VAT
- Tax office
- Bank Name
- Bank account IBAN
- Bank BIC
- Account owner
- Footer 1
- Footer 2
- Footer 3

8.9 Own letterhead (optional)
Create your own stationery, which will be used as a background on the invoice. To do this, upload a file in A4 format.
The positions and fields are superimposed by billtano. If necessary, adjust your layout so that the layout is placed cleanly and accurately.

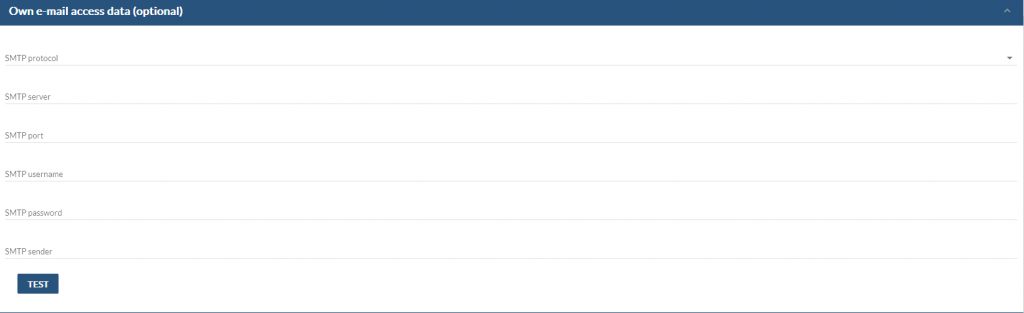
8.10 Own e-mail access data
Here you can connect your e-mail inbox to billtano. The data you need for this is provided by your mail provider where the mailbox is created. Enter the following data to link the applications with each other.
- SMTP (Protocol)
- SMTP Server
- SMTP Port
- SMTP Username
- SMTP Password
- SMTP Sender
This allows you to automatically send invoices by email after you have created them.
You can use the “Test” button to send a test email to check the functionality of your settings.
8.11 Bank reconciliation (encrypted, optional)
Enter your bank details here in encrypted form. It is then possible for the paid invoices to be marked automatically.
- Sort code
- Bank account username
- Bank PIN
The bank data is transmitted via official interfaces and is encrypted. The feature is optional, but makes it easier for you to verify your payments.

8.12 Order processing (OP)
Here you will find a sample PDF for order processing.
If necessary, select your own file to upload.

Click on “Save settings” at the bottom right to confirm the entries.